How to Pack Sharp Objects Safely


Moving day always brings that moment when you’re staring at your knife block wondering how on earth you’re going to pack these safely without someone getting hurt or your favourite chef’s knife getting chipped.
Whether it’s kitchen knives that make cooking a joy, garden tools that keep your backyard looking great, or workshop equipment that helps you tackle weekend projects, sharp objects need special care during moves and storage. The good news is that with the right approach, you can pack everything safely without stress or accidents.
Here’s how to protect your sharp objects and everyone handling them, using simple techniques that work for real-world moving and storage situations.
Key Takeaways:
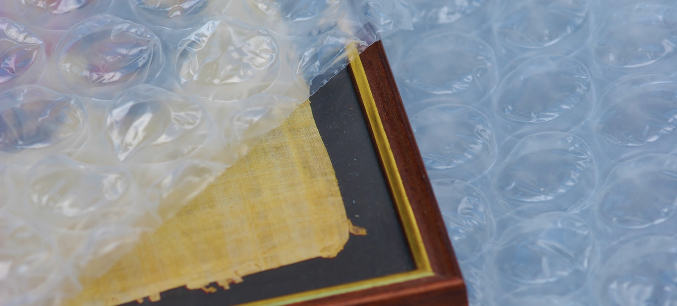
- Wrap smart, not hard: Use bubble wrap with bubbles facing outward, never against the blade. This protects edges while preventing damage from bubble impressions.
- Try the towel roll method: For kitchen knives, lay them on a thick towel with blades pointing the same direction, roll tightly, and secure. Professional chefs swear by this technique.
- Remove what you can: Take apart anything that comes apart. Food processor blades, saw attachments, garden tool heads. Pack components separately for safety.
- Label clearly and honestly: Mark boxes “SHARP OBJECTS” on all sides and let anyone helping you know what’s inside. No surprises equals no accidents.
- Store smart: Keep boxes upright, never stack heavy items on top, and ensure easy access for unpacking without reaching blindly into containers.
What Sharp Objects Require Special Packing Attention?
Not everything sharp requires the same level of care. Understanding what needs extra protection helps you focus your efforts where they matter most.
High-Risk Items Requiring Maximum Protection
Quality Kitchen Knives: Your good chef’s knives, paring knives, and specialty blades deserve individual wrapping. These are expensive to replace and easy to damage if not protected properly.
- Chef’s knives, paring knives, and specialty blades
- Food processor blades and mandoline slicers
- Can openers with exposed cutting wheels
- Meat grinders and electric knife components
Workshop and Garden Tools: Saw blades, drill bits, router bits – anything that attaches to power tools should be removed and packed separately from the main tool.
- Saw blades (circular, band, hand saws)
- Chisel sets and woodworking tools
- Garden shears, pruning tools, and hedge clippers
- Axe heads and splitting mauls
- Router bits and drill bits
- Planer blades and jointer knives
- Angle grinder discs
- Chainsaw chains and guide bars
Household and Craft Items: Food processor blades, mandoline slicers, and can openers with sharp edges. These often have multiple cutting surfaces that need protection.
- Razor blades and utility knife blades
- Scissors (especially large or professional grades)
- Craft knives and rotary cutters
- Glass pieces with sharp edges
Risk Assessment by Object Type
Extreme Risk (Professional Handling Recommended): Medical sharps, power tool blades over 200mm, and industrial cutting equipment require professional packing services. These items can cause severe injuries and may have regulatory disposal requirements.
High Risk (Specialised Packing Required): Large kitchen knives, garden tools with long blades, and workshop chisels need individual wrapping, rigid protection, and clearly marked containers.
Moderate Risk (Standard Safety Protocols): Household scissors, small craft knives, and basic tools can be safely packed using standard techniques with proper materials and labelling.
How Do You Pack Kitchen Knives and Culinary Tools Safely?
The professional kitchen approach works perfectly for home moves and keeps both your knives and everyone helping you safe.
The Towel Roll Method
This technique comes straight from professional kitchens where chefs transport knife collections safely:
- Lay out a thick kitchen towel on a flat surface
- Place knives with handles aligned and all blades pointing the same direction
- Ensure blade tips hit double-layer areas of the towel for extra protection
- Roll tightly and secure with rubber bands or elastic ties
- Place the roll in a rigid container to prevent crushing
Individual Knife Protection
For especially valuable knives or when you don’t have suitable towels:
Wrap each knife separately in bubble wrap, keeping bubbles facing outward. This prevents bubble impressions on the blade while providing cushioning. Use minimal tape and avoid contact with the actual blade surface.
Add cardboard guards for extra protection by folding cardboard around the blade and taping the cardboard to itself, not the knife.
What Not to Do
Never pack knives loose in boxes where they can move around. Avoid wrapping blades in newspaper (can stain) or placing bubble wrap bubbles against the cutting edge (creates permanent impressions).
If you’re packing kitchen items as part of a house move, our moving house checklist includes helpful timing tips for managing kitchen packing efficiently during busy moving periods.
Kitchen Knife Packing Checklist
Before Packing:
All knives cleaned and completely dried
Blade guards removed and packed separately if applicable
Sharp objects counted and documented for inventory
Packing materials ready: bubble wrap, thick towels, rubber bands
During Packing:
Each knife is individually wrapped with bubbles facing outward
Maximum 5 knives per towel roll bundle
Blade tips protected with double-layer material
No loose knives in containers
After Packing:
Containers clearly labelled “SHARP OBJECTS”
Weight distributed evenly in boxes
Inventory list created with contents description
Handling instructions provided to movers
Specialised Culinary Equipment:
Food Processor Blades: Remove all detachable cutting components and pack in original containers with protective covers. If original packaging isn’t available, create custom foam inserts that prevent movement and blade contact.
Mandoline Slicers: These extremely sharp tools require complete disassembly, with each blade component individually protected. Document reassembly instructions with photos before disassembly.
What Are the Best Techniques for Power Tools and Workshop Equipment?
Power tools need systematic disassembly to keep sharp components safe and prevent damage during transport.
Take Apart What You Can
Remove All Detachable Blades: Circular saw blades, router bits, planer knives – anything that attaches and detaches should be packed separately from the main tool. This protects both the tool and the cutting elements.
Use Original Cases When Possible: Manufacturers design these containers specifically for safe transport. If you’ve kept the original packaging, use it.
Create Custom Protection: For tools without original cases, cut foam slots that hold components securely. Simple craft foam from hardware stores works well for creating custom protective inserts.
Workshop Tool Packing Tips
Group Similar Items: Pack drill bits together, saw blades together, and so on. This makes unpacking easier and keeps similar safety requirements in one place.
Protect Cutting Edges: Use cardboard sleeves, foam guards, or original blade guards to prevent edge damage and accidental contact.
Document What Goes Where: Take photos before disassembling complex tools so you remember how everything goes back together.
Workshop Tool Storage Solutions
| Tool Type | Packing Method | Container Requirements | Special Considerations |
|---|---|---|---|
| Circular Saw Blades | Individual sleeves, stack vertically | Rigid box with foam separators | Mark tooth count and blade type |
| Router Bits | Original cases or foam blocks | Secure latching containers | Group by shank size |
| Hand Chisels | Individual blade guards, bundle handles | Cushioned tool roll or case | Maintain edge protection |
| Hand Planes | Retract blades, wrap separately | Original boxes preferred | Oil metal surfaces before storage |
Workshop Safety Requirements:
Cut-Resistant Gloves: Mandatory when handling multiple sharp objects or during packing operations. Modern HDPE materials provide excellent protection while maintaining dexterity for detailed work.
Proper Lighting: Ensure adequate lighting when packing workshop tools to identify all sharp edges and prevent accidents during handling.
Organised Approach: Pack similar tools together and maintain a systematic inventory to prevent lost components and ensure safe unpacking procedures.
Garden Tools and Large Equipment
Bigger tools bring bigger challenges, but the same principles apply: protect edges, secure everything, and think about who’s handling the packed items.
Large Tool Strategy
Clean First: Remove all soil and plant material before packing. This prevents rust and makes handling much more pleasant for everyone involved.
Disassemble Where Possible: Remove blades from hedge trimmers, take heads off long-handled tools, and separate any components that come apart easily.
Bundle Long Handles: Group tools with similar handle lengths and secure with moving blankets. This creates stable bundles that are easier to move and store.
Creating Safe Guards
For tools that can’t be disassembled, create rigid blade guards using folded cardboard secured with tape. Make sure guards extend beyond the cutting edges and can’t slip off during handling.
Garden Tool Safety Checklist
Preparation Phase:
Clean all tools and remove soil/plant material
Oil metal surfaces to prevent rust during storage
Remove detachable sharp components where possible
Assess which tools require professional handling
Packing Phase:
Create rigid guards for all exposed blades
Bundle similar-sized tools together
Use moving blankets for cushioning and bundling
Secure bundles with straps or rope, not just tape
Container Requirements:
Use long boxes or custom containers for extended tools
Ensure no protruding sharp edges from containers
Label containers with tool types and sharp object warnings
Plan container placement to prevent tipping or shifting
What Storage Solutions Work Best for Different Sharp Object Types?
Where you store sharp objects depends on their value, how often you need them, and what space you have available.
Professional Storage System Comparison
| Storage Method | Cost Range | Best For | Pros | Cons |
|---|---|---|---|---|
| Self-Storage Units | $50-600/month | Mixed collections, seasonal access | Professional environment, flexible access, upsize and downsize as you need | Monthly costs, self-managed organisation |
| Workshop Storage Cabinets | $500-2,000 one-time | Active tool collections | Immediate access, secure locking | Space requirements, not suitable for large items |
| Professional Tool Storage | $200-800/month | High-value collections | Expert handling, insurance options | Higher costs, limited access |
| Home Storage Solutions | $100-500 setup | Small collections, frequent use | Cost-effective, convenient access | Security concerns, space limitations |
When Home Storage Works
Small collections of everyday items can be stored safely at home using proper containers and organisation systems. Wall-mounted magnetic strips work well for kitchen knives, while locked tool cabinets suit workshop equipment.
When Professional Storage Makes Sense
Security Advantages: Quality storage facilities provide better security than most home setups, important for expensive tool collections or when insurance requires professional storage.
Space and Convenience: When home storage isn’t practical due to space constraints or safety concerns, professional storage provides organized, accessible solutions.
Our facilities provide the ideal environment for storing sharp objects safely. With wide aisles for easy access, secure individual units, and 24/7 monitoring, we ensure your tools remain in perfect condition while maintaining safety for all facility users.
Give your equipment the professional protection it deserves. Explore our personal storage options at Roomia today!
Simple Safety During Storage
Regular maintenance during storage prevents problems and ensures everything stays in good working order.
Basic Storage Checks
Check stored tools every few months for any signs of rust, moisture, or pest activity. This catches small problems before they become expensive issues.
Ensure containers remain properly sealed and labeled. Good organisation makes retrieval safe and prevents accidents during access.
Preventing Rust in Storage
Use moisture absorbers in tool containers, especially in humid areas. A light coating of oil on metal surfaces before storage provides additional protection against corrosion.
Risk Mitigation Value: Professional packing services can reduce injury risk by up to 90% while providing insurance protection and expert handling that preserves tool condition and value.
Keeping Everyone Safe and Your Tools Protected
Smart packing of sharp objects protects both your investment and everyone involved in your move. The right techniques prevent accidents while ensuring your tools emerge from storage in perfect working condition.
Whether you’re moving house, renovating, or storing seasonal equipment, taking time with proper protection methods saves money and prevents injuries. Professional storage often provides the consistent conditions that keep metal tools and precision instruments in optimal condition.
Ready to give your sharp tools the secure, spacious, storage they need? Our facilities are designed to protect valuable equipment while providing the access and security that tool owners appreciate. Find your nearest Roomia location and discover why Australian households and businesses trust us with their important tools and equipment.
Related Storage Tips

How to Pack a Storage Unit Like a Pro
Follow these expert tips on how to pack your storage unit to ensure your items stay safe and are easily retrievable.
How to pack artwork: Expert Tips for Moving & Safe Storage
Take these steps to properly pack and protect your artwork while in transit and storage.